
Christmas Fudge Recipe — Festive White Chocolate Swirl Fudge 🍬🎄
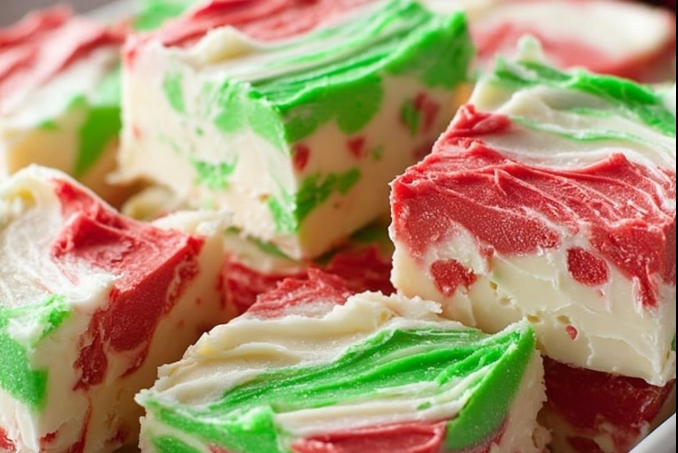
This cheerful Christmas Fudge transforms simple white chocolate and vanilla frosting into a glossy, sliceable holiday treat with red and green swirls. Perfect for cookie trays, neighbor gifts, or a sweet centerpiece at holiday gatherings. It’s quick, no-bake, and produces beautiful results every time. 🎅✨
What You’ll Make (Overview)
A quick snapshot
- Yield: roughly one 8×8 pan (about 36 small squares depending on how you cut)
- Technique: stovetop double-boiler melt + swirl
- Set time: 1–2 hours chilling in the refrigerator
- Skill level: beginner-friendly
Ingredients — exact amounts & simple swaps 🧾
Primary ingredients
- 22 ounces white chocolate chips (approx. 624 g) — high-quality chips or chopped couverture for the best sheen 🍫
- 1¾ cups vanilla frosting (about 420 g) — jarred buttercream-style frosting works; see notes for homemade alternative 🥣
- 1 teaspoon red gel food coloring (use concentrated gel, not liquid, for vivid color) 🔴
- 1 teaspoon green gel food coloring (concentrated gel) 🟢
Optional add-ins & variations
- 1/2 cup chopped toasted pecans or walnuts (60–70 g) — for crunch 🌰
- 1/4 tsp almond extract — adds depth and pairs beautifully with white chocolate 🌰
- Freeze-dried cranberry pieces or finely chopped peppermint candy — festive texture & flavor ❄️
- Sprinkles or edible gold dust for finishing — visual pop ✨
Tools & prep you’ll want
List of tools
- 8×8 inch (20×20 cm) square baking pan
- Parchment paper, sized so it overhangs the pan for easy lifting
- Double boiler (or a heatproof bowl set over a small saucepan)
- Spatula and 2–3 small heatproof bowls for color divisions
- Large spoon and butter knife for dolloping & swirling
- Thermometer (optional) — not necessary, but useful if you watch temperature for tempering)
Step-by-step instructions — follow these for glossy firm fudge 🍽️
1) Line the pan
Cut a sheet of parchment paper large enough to line an 8×8 pan with overhang on two opposite sides — this makes removing the fudge simple. Lightly grease the pan if you like, though the parchment is usually sufficient.
2) Melt white chocolate & frosting together (double boiler)
Fill the bottom of a saucepan with about 1–2 inches of water and bring to a gentle simmer. Place the white chocolate chips and the vanilla frosting in a heatproof bowl that sits over (not in) the simmering water. Keep heat at medium-low and stir every 1–2 minutes. The combination will melt into a glossy, smooth mixture in approximately 8–10 minutes. Patience is the key — do not overheat.
Pro tip: If chocolate gets too hot it can seize or become grainy. Remove from heat when fully melted and smooth, and stir off-heat for a minute to bring the temperature down.
3) Divide the melted mixture into three equal portions
Use two additional bowls and spoon evenly until you have three bowls with as close to identical volumes as possible — one for red, one for green, and one for plain white.
4) Color the portions
Add the red gel to the first bowl and stir until uniform. Add the green gel to the second bowl. Leave the third bowl white. Gel color is highly concentrated; start with the specified 1 teaspoon, then adjust if you want more vivid tones. Wear gloves if you’re worried about staining fingers.
5) Dollop into the pan
Using a tablespoon or large spoon, dollop about 2 tablespoons from each colored bowl randomly across the parchment-lined pan. Continue alternating colors so you have an attractive scatter of red, green, and white blobs.
6) Swirl to create a marbled pattern
Take a butter knife or offset spatula and drag through the dollops in a loose figure-eight and circular motion — don’t over-swirl or you’ll muddy the colors. The goal is pretty marbles and veins of color, not a uniform color.
7) Chill to set
Place the pan, uncovered, in the refrigerator for 1–2 hours to firm up. The fudge should feel set to the touch and slice cleanly. For best texture, chill at least 90 minutes.
8) Remove, temper briefly at room temp, then slice
Lift the fudge out with the parchment overhang and let it sit at room temperature for about 15–20 minutes — this makes slicing neater and reduces crumbly edges. Use a sharp knife (warmed under hot water and dried) to make clean cuts into squares.
Professional chef tips — quick wins from the pros 👩🍳👨🍳
- Chef Gordon Ramsay: “Never let chocolate contact boiling water — use a gentle simmer and remove the bowl from heat when everything is melted.”
- Chef Bobby Flay: “For texture contrast, fold in 1/2 cup toasted nuts or crushed candy canes before dolloping.”
- Ina Garten: “Use a good-quality white chocolate — it makes a huge difference. If your white chocolate tastes waxy, try a different brand.”
- Ree Drummond (The Pioneer Woman): “Make extras for neighbor gifts — the fudge stores well and is perfect in small festive boxes.”
Food safety, allergens & best practices 🛡️
Allergens to note
- White chocolate contains milk — not suitable for dairy-free diets unless you use a plant-based white chocolate alternative.
- Vanilla frosting may contain egg (rare) or soy-based emulsifiers; check labels for allergens.
- Add-ins like nuts are common allergens — clearly label gifts or servings.
Food safety tips
- Always work with clean, dry utensils — water can seize chocolate.
- Store fudge refrigerated in an airtight container. Shelf-stable for a short time in cool climates, but refrigeration lengthens freshness (up to 2 weeks refrigerated when sealed).
- When gifting, use food-safe packaging and label for refrigeration if kept chilled.
Nutrition & health table — estimated values per serving (36 pieces) 🧾
Nutrition estimates are approximate. Values below assume the basic recipe (no nuts or add-ins) and 36 pieces per 8×8 pan.
| Ingredient | Amount used | Weight (approx.) | Calories (total) | Calories per piece (36) | Notes |
|---|---|---|---|---|---|
| White chocolate chips | 22 oz | 624 g | ~3,120 kcal | ~86.7 kcal | Primary source of calories & fat |
| Vanilla frosting | 1¾ cups | ~420 g | ~1,680 kcal | ~46.7 kcal | Contains sugar & vegetable oil/butter |
| Gel food coloring | 2 tsp total | ~10 g | ~0 kcal | 0 kcal | Negligible calories |
| Total (basic recipe) | ~1,054 g | ~4,800 kcal | ~133 kcal / piece | Estimate — varies by brand & add-ins |
Nutrition notes: These fudge squares are indulgent—high in sugar and saturated fat. Enjoy in moderation. Adding nuts increases protein and healthy fats but also increases calories.
Storage, gifting & packaging ideas 🎁
Short-term & long-term storage
- Refrigerator: Store in an airtight container for up to 2 weeks. Layer with parchment between rows to prevent sticking.
- Freezer: Individually wrap squares in plastic wrap and place in a freezer-safe bag for up to 3 months. Thaw in fridge overnight before serving.
Gifting tips
- Wrap sets of 4–6 squares in parchment and tie with ribbon. Place in holiday tins or boxes with a label indicating refrigeration.
- Include an ingredients label for allergy safety (e.g., “Contains milk; may contain tree nuts”).
Troubleshooting — quick fixes
My chocolate seized while melting — what do I do?
If it becomes grainy or seized, remove from heat and add 1–2 teaspoons of neutral oil (vegetable or coconut) and stir vigorously to smooth. If that fails, salvage by using a small amount of warm cream to loosen texture—note this changes consistency slightly.
The fudge is too soft after chilling
Return to the fridge for another hour. If still soft, there may have been excess liquid in the frosting or pineapple (if you added fruit). Warm slightly and fold in a few tablespoons of melted white chocolate to stiffen, then re-chill.
Colors are muted
Gel colors vary in strength. For brighter hues, add a small pinch more gel color (stir thoroughly). Avoid liquid food coloring — it can alter texture.
10 Detailed FAQs — everything you might ask ❓
1. Can I use chopped white chocolate instead of chips?
Yes — chopping a high-quality white chocolate bar (couverture) melts more evenly than some chips and often yields a glossier finish. Chips sometimes contain stabilizers that can slightly affect texture.
2. Is it necessary to use confectioners’ or vanilla frosting?
The frosting acts as both a sweetener and binder, giving the fudge body and a creamy texture. You can substitute with an equal weight of sweetened condensed milk (about 400–425 g) for a different, denser fudge profile. If substituting, reduce any additional liquids in variations.
3. Can I make this dairy-free or vegan?
Yes. Use vegan white chocolate (cocoa butter-based) and a dairy-free vanilla frosting. Keep in mind that textures and flavors will vary; some vegan white chocolates can be less sweet or slightly different in mouthfeel.
4. What pan sizes work besides 8×8?
An 8×8 yields a nice thickness. You can use a 9×9 for slightly thinner pieces or a loaf pan for taller fudge. Adjust cutting yield accordingly.
5. Why did my fudge bloom (white film) on top?
Fat bloom occurs when the fat separates slightly due to temperature fluctuations. Store the fudge consistently refrigerated to minimize this. Bloom affects appearance but not safety; re-melting and re-setting can restore appearance.
6. Can I layer flavors (peppermint, orange, etc.)?
Absolutely. Replace one color portion with a peppermint-spiked white chocolate (1/2–3/4 tsp peppermint extract) or orange zest + a touch of orange extract. Keep flavor additions minimal so they don’t thin the mixture.
7. How do I get clean slices?
Warm a sharp knife under hot water, dry it thoroughly, and cut using a single downward motion. Wiping the knife between cuts produces the neatest edges.
8. Can I pipe the colors instead of dolloping?
Yes — transfer each color to a piping bag and pipe small rounds in alternating colors. This gives a more controlled marbling pattern for decorative trays.
9. What is the best way to make this ahead for a party?
Make, chill, and slice 1–3 days ahead. Keep chilled in an airtight container. If giving as favors, wrap the day of the event for freshest texture and appearance.
10. How can I reduce sweetness while retaining texture?
White chocolate and frosting are sweet by nature. You can reduce perceived sweetness by adding a small pinch (1/8–1/4 tsp) flaky sea salt to the melted white chocolate before dividing; salt enhances flavor complexity. Alternatively, use a less-sweet frosting (or reduce quantity slightly), but be cautious — texture will be affected.
Flavor variations & creative ideas 🎨
- Peppermint snow: Add 1/2 tsp peppermint extract to the white portion and top with crushed candy canes.
- Cherry-chocolate: Fold in 1/4 cup chopped maraschino cherries (well drained) for bursts of color.
- Nutty nougat: Stir in 1/2 cup toasted pecans for chew and crunch.
- Gold-dusted elegance: After chilling, dust the top with edible gold shimmer for a luxe finish.
Internal Links & Further Reading
Pair this fudge with other seasonal sweets and guides on Fresh Toner Hungar. Useful articles you might enjoy:
- Holiday Cookie Box Ideas — creative packaging for gifting
- The Perfect Hot Chocolate — cozy pairings for fudge
- Easy No-Bake Desserts — more simple treats for busy holidays
Final notes — serve, savor, celebrate 🎉
Christmas Fudge is one of those recipes that looks far more elaborate than it is. With a double-boiler, a few bowls, and your favorite gel colors, you’ll have glossy, festive squares perfect for sharing. Keep portions modest, store carefully, and have fun customizing. Happy holidays and sweet baking! 🎁🍬