
How to Grow Hydrangeas from Cuttings: A Complete Step-by-Step Guide 🌸
Hydrangeas are beloved for their bold, beautiful blooms and their ability to bring elegance to any outdoor space. But did you know you can easily grow new hydrangea plants at home—without spending a fortune? Propagating hydrangeas from cuttings is a cost-effective and rewarding way to multiply your garden’s charm.
Whether you’re a beginner or an experienced gardener, this detailed guide will walk you through the process of growing hydrangeas from cuttings, step-by-step. You’ll not only save money but also preserve your favorite plant varieties and embrace a more sustainable way to garden.
🌿 Why Propagate Hydrangeas from Cuttings?
- Cost-Effective: Create new plants for free from your existing hydrangeas.
- Preserve Varieties: Keep your favorite bloom colors and shapes going strong.
- Sustainable Gardening: Reduce nursery purchases and lower your gardening footprint.
- Quick Results: Cuttings root and grow faster than seeds—expect blooms sooner!
“Propagation gives gardeners full control over their plant genetics. It’s a beautiful way to expand your garden sustainably,” says Dr. Leila Nour, horticulturist and plant sciences expert.
🕒 Best Time to Take Hydrangea Cuttings
Timing matters! Here’s when to take the best cuttings:
- Softwood Cuttings: Late spring to early summer (ideal for beginners).
- Semi-Hardwood Cuttings: Late summer to early fall (slightly tougher stems).
🧰 Tools and Materials You’ll Need
- Sharp pruning shears or scissors
- Clean pot or container
- Rooting hormone (optional, but boosts success)
- Well-draining potting mix or perlite/peat moss mix
- Spray bottle filled with water
- Clear plastic bag or humidity dome
- Plant labels or markers (optional)
🪴 Step-by-Step Guide: How to Grow Hydrangeas from Cuttings
1. Choose a Healthy Mother Plant
Start with a vibrant, disease-free hydrangea. Look for strong, green stems for the best results.
2. Take the Cutting
Cut a 4–6 inch piece just below a leaf node using sterilized shears. Aim for stems with at least 2–3 nodes.
3. Prepare the Cutting
- Remove lower leaves.
- Trim remaining leaves in half.
- Remove any flowers or buds to help focus growth on roots.
4. Apply Rooting Hormone (Optional)
Dip the cut end into rooting hormone powder or gel. This increases your success rate, especially in humid or cooler climates.
5. Plant the Cutting
Place in a pot filled with moist, well-draining mix. Insert the cutting so that at least one or two nodes are buried.
6. Create a Humid Environment
Mist gently with water. Cover with a clear plastic bag or humidity dome, using stakes to keep plastic off leaves.
7. Find the Ideal Location
Set the pot in a warm, bright area with indirect sunlight. Best rooting temperatures: 65°F to 75°F (18°C – 24°C).
8. Monitor & Care Daily
- Keep the soil moist, not soggy.
- Ventilate daily to prevent mold.
- Check for rooting in 2–4 weeks by gently tugging the stem.
🌳 Transplanting Rooted Hydrangeas
Steps to Success:
- Choose the Right Spot: Partial to full shade, depending on the variety.
- Prepare the Soil: Mix compost or organic matter for extra nutrition.
- Transplant Gently: Plant at the same depth as in the pot.
- Water Well: Keep soil evenly moist for the first few weeks.
📝 Table of Key Benefits & Details
| Step | Benefit | Material/Tip |
|---|---|---|
| Softwood Cutting | Faster root growth | Spring or early summer |
| Use Rooting Hormone | Increased success rate | Powder or gel form |
| Humidity Dome | Prevents moisture loss | Clear plastic bag/stakes |
| Compost Mix | Boosts nutrient availability | Use during transplanting |
🛡️ Tips for Long-Term Success
- Use fresh cuttings in the morning for best hydration.
- Don’t overwater—too much leads to rot.
- Label each pot if propagating multiple varieties.
- Shield young plants from frost and intense weather.
🚫 Common Problems & Smart Solutions
- Wilting Leaves: Move to shade and mist frequently.
- Mold/Mildew: Improve ventilation and reduce humidity briefly each day.
- No Roots After Weeks: Try fresh, younger cuttings and use rooting hormone.
🔟 Top 10 FAQs About Growing Hydrangeas from Cuttings
- How long does it take for hydrangea cuttings to root?
Generally 2–4 weeks, depending on temperature and humidity. - Should I use rooting hormone?
It’s optional but highly recommended to improve success rates. - Can I root hydrangeas in water?
Yes, but soil propagation usually yields stronger plants. - What’s the best soil for transplanting rooted cuttings?
Well-draining, rich in compost, and slightly acidic to neutral pH. - When is it safe to move the plant outdoors?
Once roots are well-developed and temperatures are frost-free. - Do I need to fertilize the cutting?
No fertilizer is needed until the plant establishes roots. - Can all hydrangeas be propagated this way?
Most common varieties (like Hydrangea macrophylla) propagate well from cuttings. - Why are my cuttings turning black?
Likely due to rot or fungal infection—ensure proper drainage and ventilation. - How do I know if rooting was successful?
A gentle tug will show resistance if roots have formed. - What’s the fastest-growing hydrangea variety from cuttings?
‘Endless Summer’ and ‘Annabelle’ tend to root and grow quickly.
🎨 Outdoor Decorating Ideas with Hydrangeas
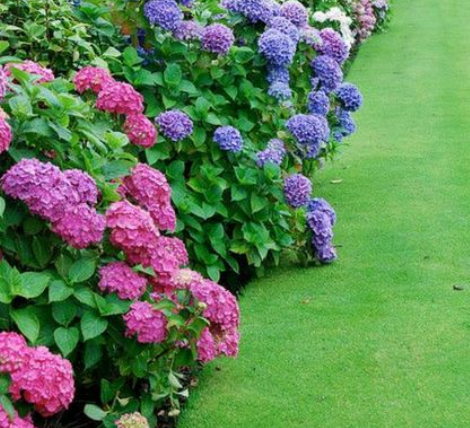
- Use hydrangeas in border designs for a lush, structured look.
- Create color-themed garden beds using different hydrangea hues.
- Grow in containers to flank patios or entryways with seasonal color.
- Pair with hostas and ferns for stunning shade garden combos.
- Use dried hydrangea blooms in wreaths or floral arrangements.
Whether you’re expanding your collection or sharing with friends, growing hydrangeas from cuttings is a satisfying, eco-friendly hobby. For more gardening tips, tools, and natural solutions, visit www.freshtonerhungar.com 🌼