
No Bake Caramel Crunch Butterfinger Truffles 🍫🍬
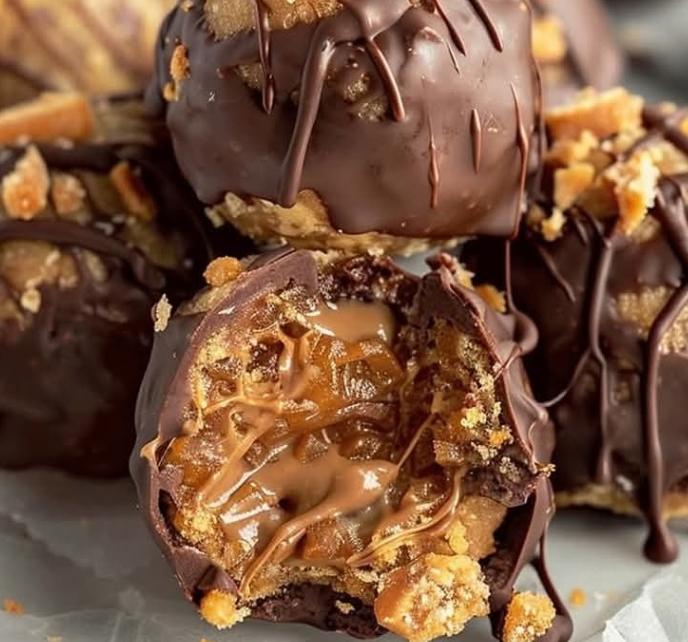
Imagine rich caramel sauce, crunchy bits of :contentReference[oaicite:0]{index=0} candy bars, all coated in silky chocolate — and you didn’t even turn on the oven. These No‑Bake Caramel Crunch Butterfinger Truffles are an indulgent, effortless treat perfect for parties, holidays, or anytime you need a decadent sweet without the bake time.
Introduction
We all love a good chocolate‑candy bar mash‑up, but when you combine gooey caramel, crunchy candy bar pieces, and smooth chocolate in a truffle format — you’ve elevated dessert to a new level. These truffles bring together textures and flavours: the chew of caramel, the crunch of Butterfinger, the melt of chocolate. As Chef Gordon Ramsay might say: “When flavour, texture and ease meet — that’s cooking with confidence.”
This recipe keeps things simple: no oven necessary, minimal tools, and maximum payoff. Whether you’re prepping ahead for a gathering or simply want a treat for yourself, these truffles deliver. We’ll cover ingredients, method, expert chef tips, health & safety considerations, nutrition and benefits, internal links to further reading on your site, and 10 FAQs. Let’s get started!
Why You’ll Love This Recipe
- No baking required — just mixing, chilling and coating. Great when your oven is occupied or you want a quicker treat.
- Texture play — creamy caramel sauce, crunchy candy bar pieces, smooth chocolate shell.
- Highly giftable — present these beautifully and they feel gourmet, yet are surprisingly simple to make.
- If you enjoyed our article on Honey & Pistachio Tart with a Crunchy Base, you’ll love how this treats uses candy bars and no‑bake format to keep things fun and elegant.
Ingredients & Measurements
Here are the ingredients you’ll need — I’ve clarified approximate weights and measurements for clarity. The amounts below yield about ~24 truffles (depending on size) and can be easily doubled.
For the Truffle Filling
- 1 cup (≈ 110 g) crushed Butterfinger candy bars (about 4‑5 regular bars, crushed) :contentReference[oaicite:1]{index=1}
- 1 cup (≈ 240 ml) caramel sauce (good quality, ready‑to‑use)
For the Chocolate Coating
- 2 cups (≈ 340‑360 g) chocolate chips or melting wafers (use semi‑sweet or milk chocolate per your preference)
- Optional: Extra crushed Butterfinger pieces for garnish
Step‑by‑Step Method
Let’s walk through the method to make sure your truffles come out perfectly — with technique notes inspired by Chef Ina Garten’s “keep it simple, use good ingredients, present with joy”.
1. Prepare & Chill the Filling
Line a baking sheet or tray with parchment paper. Crush the Butterfinger bars (in a plastic bag with a rolling pin or food processor) until pieces of varying sizes (some finer crumbs, some small chunks). In a mixing bowl combine the crushed candy bars and the caramel sauce. Stir until fully incorporated. The mixture will be sticky and thick.
2. Portion the Truffles
Using a small cookie scoop or a tablespoon measure, portion out ~1 Tbsp sized portions of the mixture and roll into balls with your hands. Place each ball on the prepared parchment‑lined tray. Once all balls are formed, chill in the refrigerator for about 30 minutes (or freezer for ~15 minutes) until firm. Chilling helps the balls hold shape when coating.
3. Melt the Chocolate
While the truffle balls chill, melt your chocolate chips or melting wafers. Use a microwave in 20‑30 second bursts, stirring between each interval until smooth. Alternatively, melt in a double boiler. Make sure the chocolate is fully melted, smooth and slightly warm but not hot.
4. Dip & Finish
Using a fork or dipping tool, take one chilled truffle ball at a time and lower into the melted chocolate, coating it fully. Tap off excess chocolate on the side of the bowl, then return the coated ball to the parchment‑lined tray. If desired, immediately sprinkle additional crushed Butterfinger pieces on top while the chocolate is still wet. Repeat for all the truffles.
5. Set & Serve
Once all truffles are coated, place the tray in the refrigerator for ~10–15 minutes until the chocolate shell is firm. After setting, you can bring them briefly to room temperature before serving. Store the truffles in an airtight container, refrigerated. They will keep for ~5‑7 days. :contentReference[oaicite:2]{index=2}
Expert Tips from Chef Gordon Ramsay
- Quality matters: Use good‑quality chocolate and caramel sauce. The coating and filling shine through in a no‑bake dessert.
- Chill thoroughly: When you chill the filling balls before coating, you avoid the chocolate melting the filling and ensure crisp shells.
- Control size for consistency: Using a scoop helps ensure each truffle is uniform, so coating and setting happen evenly.
- Keep moisture out: Make sure any tools or bowls used for chocolate are completely dry — water causes chocolate to seize, which can ruin the coating.
- Store smart: Because these truffles contain caramel and candy bar pieces, store in the fridge in a single layer (or separated by parchment) to maintain their shape and texture.
Health & Safety Considerations 🍬
Yes — these are treats, and they’re indulgent — but mindful preparation and storage still matter.
- Allergen alert: This recipe contains candy bars (may include wheat, milk, soy, peanuts) and chocolate. If serving guests, indicate allergens clearly.
- Dairy & ingredients: The chocolate coating and caramel sauce likely contain dairy — ensure ingredients are fresh and stored correctly.
- Proper chilling & handling: After coating, refrigerate promptly. Don’t leave truffles out at room temperature for long periods, especially in warm climates, as caramel and candy bar filling may soften and lose shape.
- Portion control: These are rich treats — moderate serving size is advised, especially if balancing sugar or calorie intake.
- Storage hygiene: Use an airtight container, place parchment between layers if stacking, and keep refrigerated to avoid sticky mess or candy pieces melting together.
Nutrition & Health Benefits Table
| Serving | Calories (approx.) | Carbs | Fat | Protein | Key Nutrients / Benefits |
|---|---|---|---|---|---|
| 1 truffle (~1/24 batch) | ~ 120‑140 kcal | ~ 15‑18 g | ~ 7‑9 g | ~ 1‑2 g |
|
Note: These are approximate values for guidance only. Actual values depend on exact ingredient brands, sizes and serving size.
Why This Recipe Works (and Further Reading)
No‑bake desserts are gaining popularity because they save time, require fewer steps, and fit into busy schedules while still delivering big flavour. Recipes incorporating candy bars like Butterfinger make for nostalgic, fun treats that are perfect for parties or gifting. For example, the site “To Simply Inspire” describes similar no‑bake Butterfinger truffle‑style balls as “out of this world” and “perfect for parties and holiday gatherings.” :contentReference[oaicite:3]{index=3}
If you enjoyed this recipe, you might also like our article on How to Make a Perfect Chocolate Ganache and our feature on Butterfinger Balls – Easy No‑Bake Snacks for more candy‑bar‑inspired treats.
10 FAQs – Your Questions Answered
- Can I use homemade caramel instead of store‑bought sauce?
Yes — absolutely. If you make your own caramel (soft caramel sauce), just ensure it’s fully cooled before mixing with the candy bar pieces so your filling doesn’t get too runny. - What size should I make each truffle?
About 1 tablespoon of filling per truffle gives a good size (~24 truffles from this batch). If you make them larger, they’ll yield fewer servings and may require longer chilling/coating time. - Can I substitute a different candy bar?
Yes — you can use other crunchy candy bars (e.g., crushed Snickers, Twix, etc.). Just make sure they’re chopped/crushed for the filling and coating. The flavour will change accordingly. - What if the truffles are too soft to roll?
If the filling mixture is too sticky or soft to roll, place it in the refrigerator for 10–15 minutes to firm up, or place the tray in the freezer briefly before rolling. Chilling helps significantly. - Can I use dark chocolate instead of milk chocolate for the coating?
Yes — dark chocolate will give you a slightly richer flavour and higher cocoa content. It’s a fine choice if you prefer less sweet coating or want more contrast with the caramel and candy bar sweet filling. - How should I store the truffles and how long do they keep?
Store in an airtight container in the refrigerator. They’ll keep well for about 5‑7 days. You can also freeze them (wrapped) for longer storage; thaw in the fridge before serving. - Can I drizzle white chocolate or add other toppings?
Yes — for extra visual appeal you can drizzle melted white chocolate, sprinkle sea salt, or add extra crushed candy bar bits on top. These additions don’t change the base method. - Are these suitable for gifting?
Definitely! These truffles are perfect for homemade gifts — pack in decorative boxes or cellophane bags, tie with a ribbon. Just keep them refrigerated or chill until the moment of gifting. - Can I make these ahead of time?
Yes — you can prepare the filling and roll the truffle balls ahead of time (up to 24 hours), keep refrigerated until time to coat with chocolate. Then coat and chill shortly before serving or gifting. - What if my chocolate seized while melting?
Chocolate can seize (turn grainy and thick) if even a small amount of water gets in or it’s overheated. To salvage, you can add a small amount of vegetable oil or shortening and stir until smooth. Better yet, make sure all bowls and utensils are completely dry and use moderate melting increments.
Final Thoughts
These No Bake Caramel Crunch Butterfinger Truffles combine the convenience of no‑bake preparation with the indulgence of chocolate, caramel and candy bar crunch. They’re ideal for treat trays, gifting, or whenever you want something decadent with minimal fuss.
As Chef Ina Garten once said: *“If you’re going to make dessert, do it with joy—and use the best you can.”* So take your candy bars, crush them, stir in caramel, coat in chocolate—and enjoy every moment (and every bite!). 🍫