
Fruity Pebbles Cheesecake Tacos: A Fun & Decadent Dessert Mashup
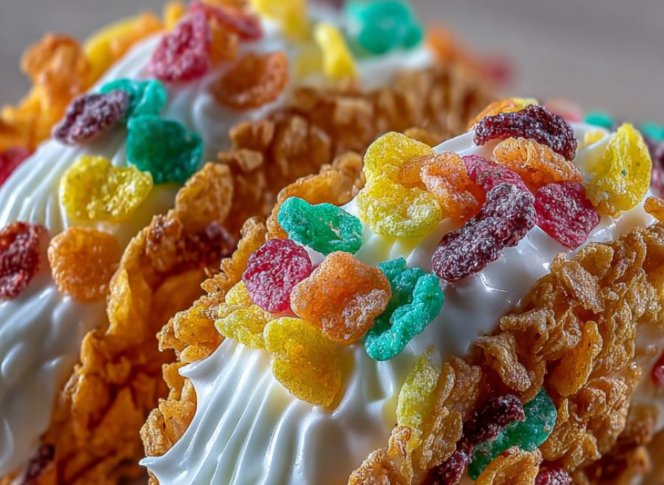
Imagine biting into a crunchy, colorful taco shell filled with creamy, tangy cheesecake filling and sprinkled with more Fruity Pebbles. It’s playful, over‑the‑top, and absolutely perfect when you want something sweet, fun, and Instagram‑worthy. These Fruity Pebbles Cheesecake Tacos are dessert tacos taken to the next level.
In this article, you’ll find:
- An introduction and origin of this idea
- Step‑by‑step instructions (with tips from Chef Bobby Flay and Gordon Ramsay)
- Health & safety notes, nutrition table
- Many FAQs and variations to customize it
- Internal links to related dessert & recipe content on www.freshtonerhungar.com
Why This Recipe Works
This recipe combines textures and flavors that people love:
– **Crunch**: the Fruity Pebbles crust adds a cereal crunch
– **Creaminess**: classic cheesecake filling
– **Fun factor**: visually vibrant, nostalgic dessert
– **Customizable**: you can alter the shell, the filling, or add fruit or sauces
It’s perfect for parties, dessert bars, kids (and adults) who love cereal, or when you want to surprise people with something whimsical.
—
Ingredients & Equipment
Ingredients
Here’s what you’ll need:
**For the Taco Shells**
– 6–8 small flour tortillas (street taco size works best)
– 1 cup Fruity Pebbles cereal
– ½ cup granulated sugar
**For the Cheesecake Filling**
– 8 oz (225 g) cream cheese, softened
– ⅓ cup granulated sugar
– ½ teaspoon pure vanilla extract
– ½ cup heavy cream (or whipping cream)
– 1 to 2 tablespoons sour cream (optional, for tang)
**To Garnish / Optional Add‑ins**
– Extra Fruity Pebbles (for dusting)
– Fresh fruit (berries, banana slices)
– Fruit sauce / coulis / jam
– Chocolate drizzle or white chocolate
– Whipped cream
– Mint leaves
**Equipment**
– Baking sheet
– Wire rack
– Parchment paper or silicone mat
– Mixing bowls
– Electric mixer (hand or stand)
– Spatula
– Small kitchen blowtorch (optional)
—
Step‑by‑Step Instructions
1. Prep the Fruity Pebbles “Crust” Blend
1. Place **1 cup Fruity Pebbles** in a resealable plastic bag or food processor.
2. Pulse lightly to crush the cereal — you want mostly fine crumbs with a few small bits for texture (don’t over‑powder).
3. Combine the crushed cereal with **½ cup granulated sugar** in a bowl, mixing evenly.
Chef Insight (Chef Bobby Flay):
> “When combining crunchy elements with cheese bases, keep a little texture — if you overblend, it becomes chalky. A few bigger bits give a satisfying bite.”
2. Form & Crisp the Taco Shells
1. Preheat your oven to **350 °F (175 °C)**.
2. Line a baking sheet with parchment paper or a silicone mat.
3. Lay your small flour tortillas flat, one by one.
4. Sprinkle a thin, even layer of the Fruity Pebbles + sugar mix on one side of the tortilla, pressing lightly to adhere.
5. Gently drape the tortilla over a curved oven rack, taco shell mold, or inverted cooling rack to give it a “U” shape (or use specialty taco shell rack molds).
6. Bake for about **8–12 minutes**, or until the tortilla is crisp but not brown.
7. Remove and allow to cool while maintaining shape (you can reinforce the curve using tins or molds if needed).
Safety Tip: The shells get hot — use tongs or mitts. Do not force children to shape hot shells without supervision.
3. Make the Cheesecake Filling
1. In a bowl, beat the softened **8 oz cream cheese** with **⅓ cup sugar** until smooth and creamy.
2. Add the **vanilla extract** and **sour cream** (if using), blending until just combined.
3. In a separate bowl, whip the **½ cup heavy cream** until soft peaks form (be careful not to overwhip).
4. Gently fold the whipped cream into the cream cheese mixture until fully incorporated.
5. Chill the filling in the fridge for **at least 20 minutes** to firm up slightly — this helps with piping or spooning.
Chef Commentary (Gordon Ramsay style):
> “Cheesecake filling must be silky and utterly smooth — no lumps, no grainy sugar. Always sift your sugar if needed, and don’t overfold.”
4. Assemble the Cheesecake Tacos
1. Use a piping bag (wide nozzle) or spoon to fill each cooled taco shell with the cheesecake mixture.
2. Don’t overfill — leave some edge for crispiness and aesthetic.
3. Sprinkle extra **Fruity Pebbles** on top for color and crunch.
4. Add optional garnishes: berries, chocolate drizzle, whipped cream.
5. Optional Finishing Techniques
– Use a small kitchen blowtorch to gently toast the top edges of the shell or the fruit for flair (like crème brûlée).
– Chill the filled tacos for **15–30 minutes** before serving to let flavors meld.
– Serve immediately for crunch; refrigerate leftovers but note shells may soften.
—
Nutrition & Health Considerations
Below is an approximate nutrition breakdown **per taco** (assuming 8 tacos total). Adjust based on your actual yield and ingredient sizes.
| Nutrient | Amount (per taco) | % Daily Value* |
|---|---|---|
| Calories | ≈ 220 kcal | ≈ 11% |
| Total Fat | 10 g | ≈ 15% |
| Saturated Fat | 6 g | ≈ 30% |
| Cholesterol | 35 mg | ≈ 12% |
| Sodium | 170 mg | ≈ 7% |
| Total Carbohydrates | 26 g | ≈ 9% |
| Dietary Fiber | 0.5 g | ≈ 2% |
| Added Sugars | 12 g | — |
| Protein | 3 g | ≈ 6% |
* Percent Daily Values are based on a 2,000 kcal diet — adjust for your needs.
**Health Notes & Tips**
– This is a dessert — indulgent, high in sugar and saturated fat.
– You can lighten it by using **reduced‑fat cream cheese** and **whipping light cream**, or even Greek yogurt in place of some heavy cream (though texture changes).
– Keep your portion size moderate — one or two tacos is plenty.
– If serving children, monitor sugar intake and offer fresh fruit alongside.
—
Serving, Storage & Presentation
**Serving Suggestions**
– Serve immediately so the shell stays crisp.
– Plate with a dusting of extra cereal, fresh berries, mint leaves, or a drizzle of sauce.
– You can serve alongside a scoop of vanilla ice cream or a small fruit cup for contrast.
**Storage Tips**
– **Unfilled shells**: store in an airtight container for up to 2 days (keep dry).
– **Cheesecake filling**: store in fridge (sealed) for up to 3 days.
– **Assembled tacos**: best consumed within a few hours — beyond that the shell will soften from moisture.
—
Variations & Customizations
– **Gluten‑free / tortilla substitute**: Use gluten‑free tortillas or crepes instead.
– **Flavor twist**: Replace Fruity Pebbles with Cocoa Pebbles, Fruity Loops, or even crushed graham crackers + cereal mix.
– **Fruit‑infused**: Fold in small chopped strawberries or raspberries into filling.
– **No bake version**: Press cereal mixture into small taco molds, chill (no oven) then fill.
– **Chocolate shell**: Use a cocoa tortilla or brush with melted chocolate before applying cereal.
– **Mini version**: Use smaller shells (tostada crisplets) for bite‑sized dessert tacos.
—
Expert Chef Tips & Tricks
– *Temperature matters*: Let your **cream cheese soften** at room temperature (20–30 minutes) before mixing — this helps avoid lumps.
– *Stabilize your filling*: If your cheesecake filling seems too soft, add a teaspoon of gelatin (bloomed in water) before folding in whipped cream.
– *Ultra crisp shells*: After initial bake, you can briefly broil (watch it!) or crisp individually before filling.
– *Prevent sogginess*: Just before filling, you can lightly brush inner shell with melted white chocolate so it seals (acts as a moisture barrier).
– *Advance prep*: You can prep the crust mix and filling a day ahead; assemble just before serving.
—
10 FAQs — Everything You Want to Know 🍓
- Can I use store‑bought taco (hard shell) shells instead?
Technically yes, but they are usually corn and may not pair well with the cereal coating. Flour tortillas crisped with cereal yield a more harmonious texture and look. - Can I bake the tacos longer to make them extra crisp?
Yes, but watch carefully — overbaking turns them golden brown and reduces color contrast. Start checking at ~8 minutes and rotate halfway. - Can I omit the sugar in the crust?
You could reduce it, but sugar helps with adhesion and gives a sweet bite. If omitted, the cereal may not stick well to the shell. - Can I use low‑fat or dairy‑free substitutes?
Yes. Use low‑fat cream cheese or plant‑based cream cheese and coconut or oat cream. Texture may be softer; chill harder before filling. - How far in advance can I prep everything?
You can crush cereal and make filling 1 day ahead. Store shells and filling separately. Assemble on the day of service. - Can I freeze the filled tacos?
Not recommended — the shell becomes soggy upon thawing. Freeze filling separately if needed. - What size tortillas should I use?
Street‑taco size (≈ 4–5 in / 10–13 cm) works best for balance between shell and filling. - Any tips for piping the filling neatly?
Use a piping bag with a round or star tip, fill only ~¾ full, and swivel while piping so the filling is even. - Why is my shell bending or collapsing?
It may need more crisping time or reinforcement while cooling (use curved molds or tins to preserve shape). Do not flip while hot. - Can I make a savory version?
This particular mashup is sweet, but you could adapt by using savory spread (e.g. cream cheese + herbs) and a savory cereal crust — though you lose the fruity nostalgia element.
—
Internal & External Related Recipes
Looking for more dessert inspiration? Try these at www.freshtonerhungar.com:
- Fruit Parfait with Yogurt & Granola — a lighter, layered fruit dessert
- Easy No‑Bake Cheesecake — classic, creamy cheesecake without baking
- Crunchy Cereal Bars Recipe — cereal bars you can cut into shapes
Use these as internal links to boost SEO and keep readers engaged.
—
Final Thoughts & Serving Notes
Fruity Pebbles Cheesecake Tacos are a whimsical twist on classic cheesecake. They delight kids and nostalgic adults alike, turning breakfast cereal into an elegant dessert. The vibrant colors, crunchy shells, and creamy filling combine to make an unforgettable bite.
Just remember:
1. Don’t skip chilling and careful shell handling.
2. Assemble close to serving time.
3. Use garnishes for flair.
Serve with fresh fruit, ice cream, or a drizzle of sauce, and watch your guests’ eyes light up when they bite into these crunchy, creamy, vibrant tacos. Enjoy the fun — and the sugar rush! 😋
—
Recipe and article brought to you by your favorite home chef team. Want video steps or downloadable print version? Just ask!